I’ve been working for several months on a soft robotics project, on which I’m making very slow progress. The goal is to create a soft robotic octopod (or hexapod) – basically an octopus with inflatable tentacles that can walk around.
I’ve been working on the tentacle design thus far. They’re to be trefoil tentacles. Here’s a video of the tentacles which gave me the idea:
My tentacles are hopefully going to be much longer and won’t look like that, probably. I’ve gone though several design revisions. Most of the early versions were hand-built in clay.
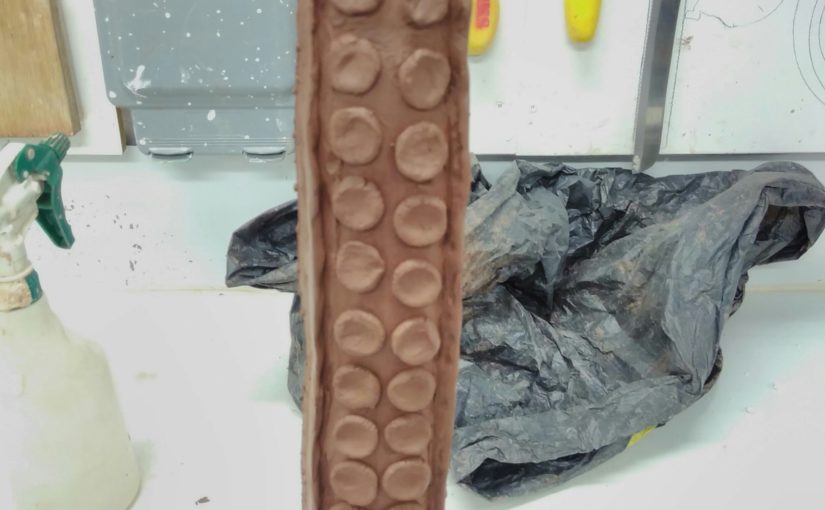
Life-like
I started by making something that looked like an actual tentacle. The idea was that I would make a cast of it in vinamold. I made clay models of spines, also cast in vinamold, that I was going to use to make wax spines. The spines would be dangled down inside the mould of the outer tentacle and silicon poured around them. Then, they’d be melted back out. The voids they left behind could be pressurised with air to make the tentacle move.
The problems with this design became quickly apparent, but the most major was the asymmetry of the exterior shape was going to make it difficult to calculate the angle of the tentacle. If all sides are equal, the pressure of the interior spaces correlates directly with the angle, but having varying thicknesses around the outside makes that much harder to compute.

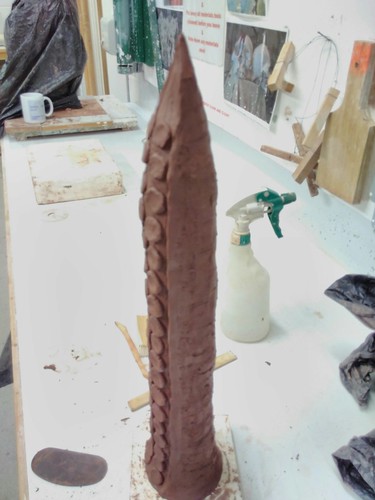
Symmetric in Vinamold
The next version uses a single model for all three sides of the tentacle. The curved part faces the outside, and the flat parts are joined in the middle to make a triangular tube down the centre of the tentacle.
I made the spine out of wood (not pictured) and then sculpted around it with clay to create the outer skin layer. I cast both parts in vinamold.

The previous version had a vertical mould, but this one was horizontal. I suspended the wax spines in the mould by casting them around a thick wire, which I embedded into the mould for the outer skin.
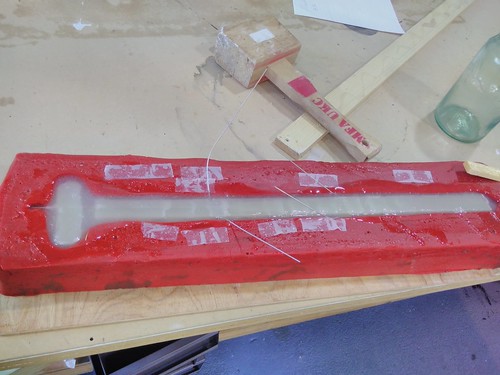
However, the wax floated in the silicon and the horizontal pour caused lamination (peel-y, layers of silicon rather than a uniform solid). When I melted the wax out, the tentacle was not air tight. It was much thicker on the rounded side than the flat side.

Vacuum Moulded
I realised I could repair the troubled tentacle by casting just a flat side for the inside layer and gluing it and the outside layer together. The best way to do this would be to do the outside layer and the inside layers separately. I also wanted the layers to be thinner overall.
Once again, I made a model in clay, but this time was very careful to keep only a tin layer around the spine. I made a vacuum mould of the spine and then added a thin skin to that spine and took a second vacuum mould. With some help from the workshop staff, I built a holder for the pair of them, with a little funnel in the top.
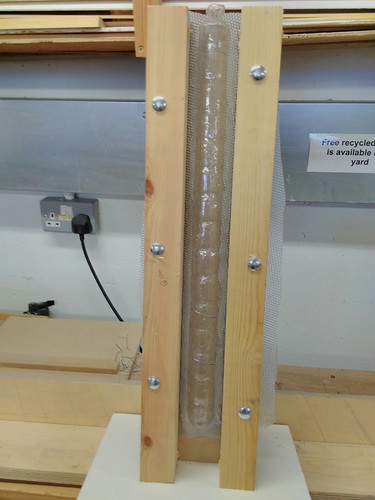
I could make a vertical pour of the silicon, which would be much more likely to hold. However, the plastics didn’t align perfectly around the edges and when I did a test pour with a cornstarch solution roughly as thick as the liquid silicon, it leaked out.
3d Printed prototype
Almost every write up of soft robotics I’ve found uses 3d printing rather than hand sculpting. I decided to switch to this more conventional approach. Using OpenScad, I wrote a little program to create a parametric mould for a tentacle.
I have terrible luck with the 3d printer owned by Kent’s School of Music and Fine Arts and the first print glitched.
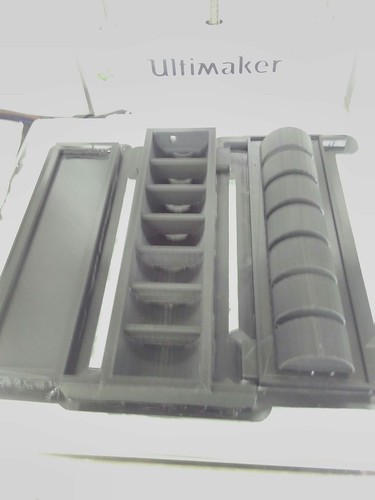
This was intended to be a short, self-contained third of a tentacle. The flat part on the left is the inside edge. The middle box is shows the outer edge. The part on the right provides the hollow sections for the void.
In addition to the print glitching, Cura silently resized it to fit into the printer, which would have made the walls too narrow. To prevent future glitches and to keep things at the correct size, I’m now printing every component separately.
Printing at Home
Almost all of the work up to this point was done in the worskshop of Kent’s School of Music and Fine Arts. I received extensive help and support from George Morris and Georgia Wright.
As the workshop was closing for Easter and I had bad luck with prints, a few people suggested I get my own printer. I got an Ultimaker 3, but was too impatient to do a self-contained, short full tentacle again.
To make a longer tentacle, it would need to be broken into sections. The first section is the length closest to the robot’s body. One end had no input or output of air. The other end has an output. The middle section has an input at one end and an output at the other. (This section can be repeated to create a much longer tentacle.) The end section has an input but no output.
I started with the first section. The end closest to the robot is at the top of this photo and then end that joins up with the subsequent section is at the bottom.

My first print did not fit together correctly, so I’ve changed the program and am trying again. The most recent version is the one pictured.
This is taking longer than I anticipated. However, over the course of things, I’ve learned to sculpt, to make rubber moulds, and to do vacuum moulding as well as other workshop-related skills.
I’m hoping to get an inflatable tentacle within the next few weeks.