Jitsi Meet works best in Chromium, so these instructions are for that browser. It also assumes that your live coding language uses Jack Audio.
Jack and Pulse
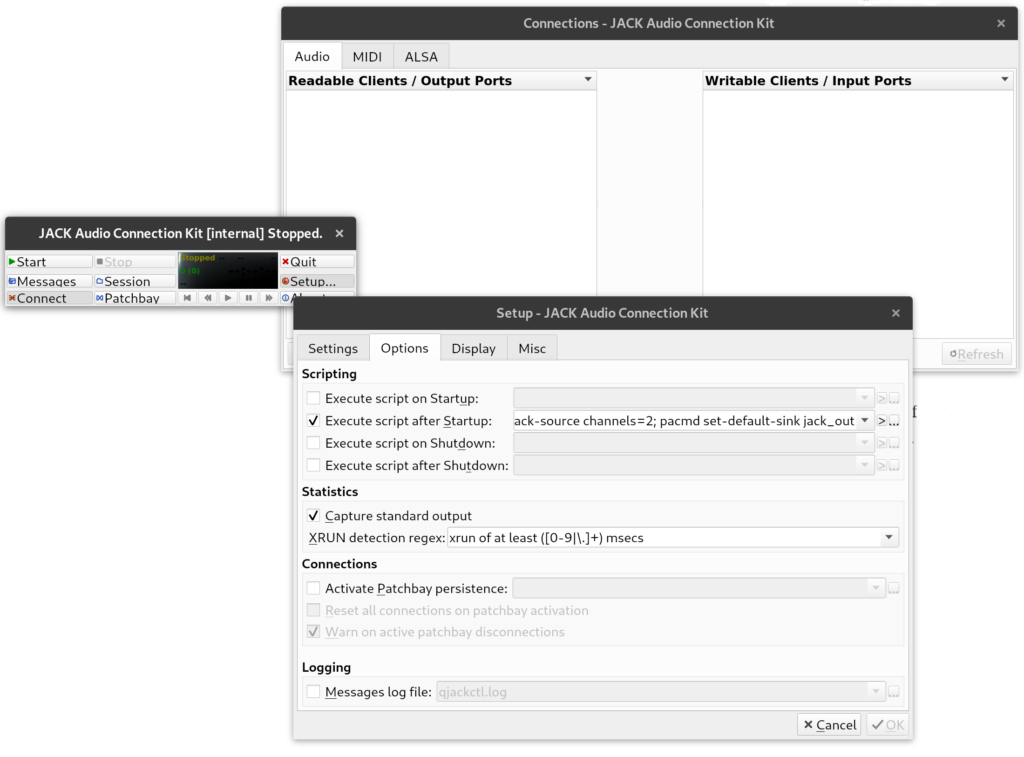
The first thing you need to do is to get Pulse Audio and Jack Audio running at the same time and talking to each other. For me, I was able to solve this in Qjackctl. In settings, under the option tab, go to Execute Script after startup. Paste in “pactl load-module module-jack-sink channels=2; pactl load-module module-jack-source channels=2; pacmd set-default-sink jack_out” without the quotes.
You can test if both are running at once by starting jack and then playing audio from a normal system program like your web browser. If you hear sounds, it worked.
More information about getting both running is here.
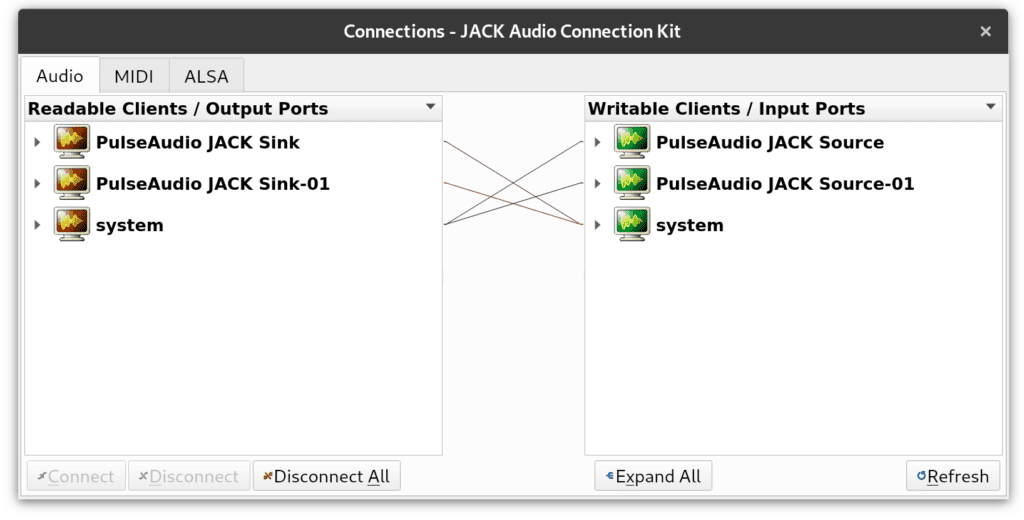
Make Connections
You get two sinks. One of them is going to be used to send audio into Jitsi and the other will be used to get audio out.
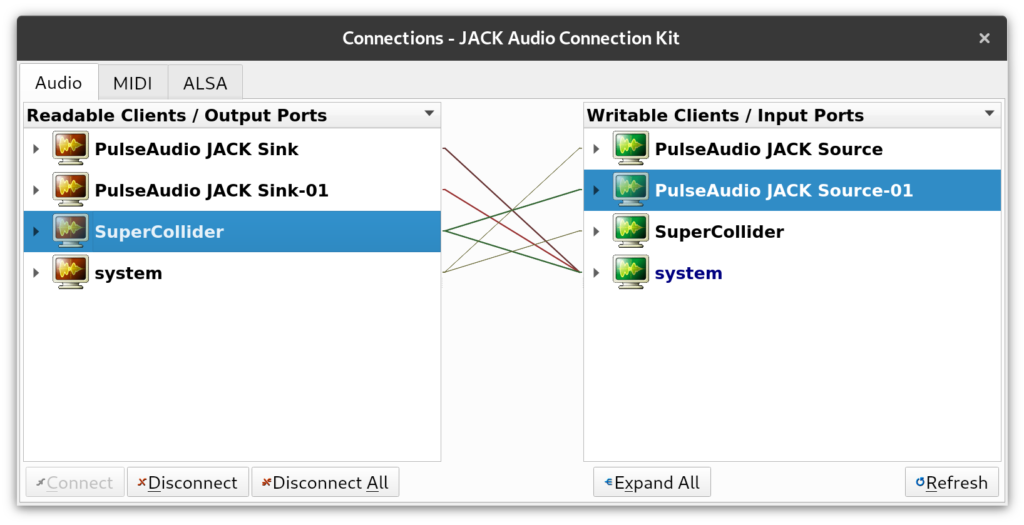
Start your live coding language audio server. (Ie Boot SuperCollider). Go back to Qjackctl. Click on connections. Go to the Audio tab. Make a connection from your live coding language output to Pulse Audio Jack Source-01 input. Do this by clicking on the language in the left column and the Source-01 in the right column so both are highlighted. Then click the “Connect” button on the lower left.
Disconnect the the system output from that Source’s input if you want to turn off your microphone. Do this by clicking on the system in the left column and Source-01 in the right column and clicking the “Disconnect” button.
Chromium Settings
(These will also work for Chrome.)
First open your Jitsi Meet connection. If you are using the server at Meet.jit.si, you can skip this step.
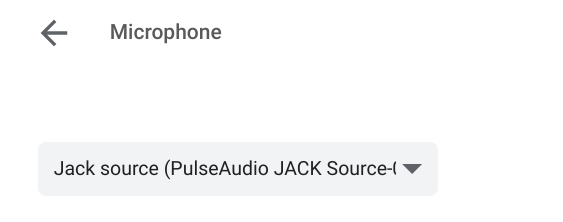
For most other Jitsi servers, in Chromium, go to chrome://settings/content/microphone Change the mic input to Pulse Audio Jack Source-01.
Jitsi Settings
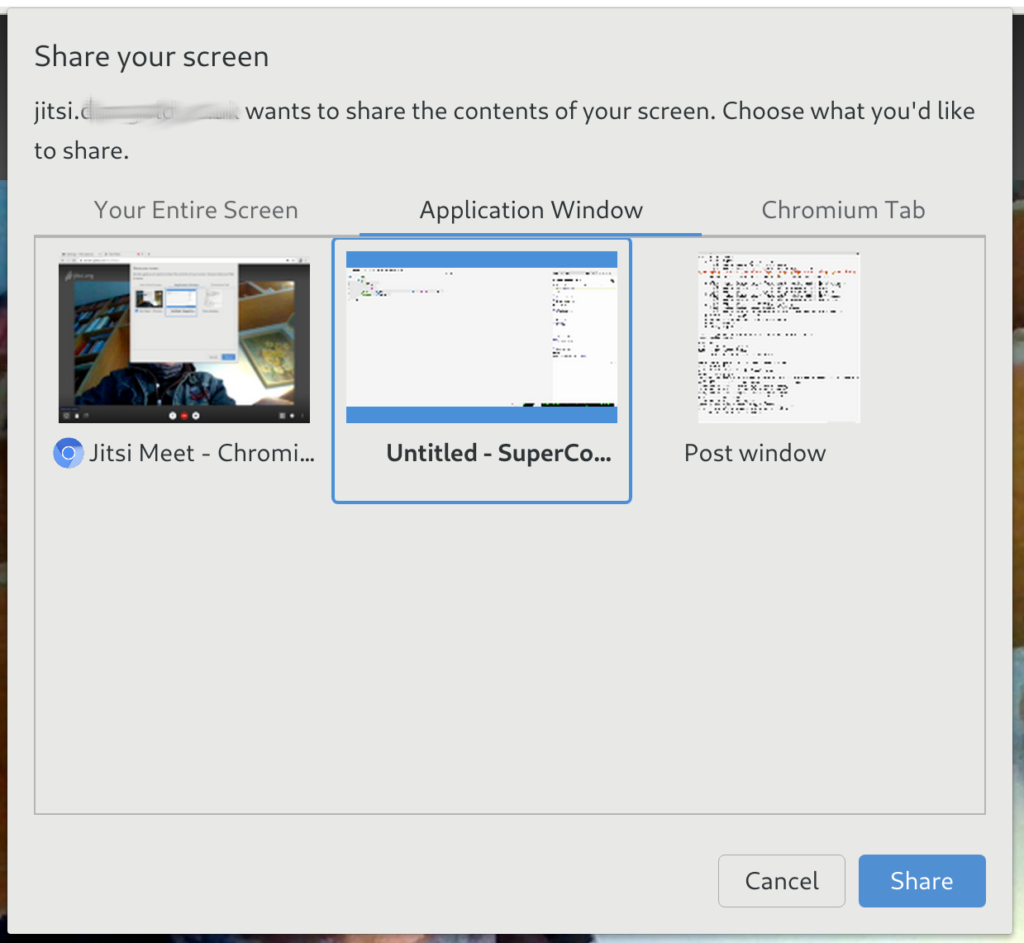
As we’re live coding, you’ll want to share your screens. Mouse over the screen so you can see the icons at the bottom appear. The one in the lower left corner looks like a screen. Click on it.
It lets you pick a video source. If you’re on Wayland, like most linux users have been for years now, you can share your entire screen, but you should be able to share a single window. If you don’t see your live coding language listed as a window, make sure Chromium and it are on the same virtual desktop.
Click the screen icon again to switch back to your webcam.
Fancy New Options
If you’re on a shiny new version of jitsi, such as the one at Meet.jit.si, You’ll see little carrots by the mic and video icons in the centre bottom of your browser window.
These allow you to pick your audio source without having to go into Chrom/ium settings. If you have more than one webcam, you can also pick which one you want to use there, without having to go into Chrom/ium settings for that either.
Be Careful of Levels!
Jitsi was made assuming that more or less one person would be talking at a time, so multiple streams at full volume can distort. Make sure to leave your output low enough to leave room for your collaborators. Your system volume controls will not work, so be sure to set the levels in your live coding language IDE.
Also be aware that while the compression sounds good for free improvisation on acoustic instruments, the transformations on digital audio will seem more pronounced. Go with it. This is your aesthetic now.