Ardour Report

I have advice. I spent some time with the native version of ardour yesterday, and, of course, a lot of time previous to that with the X11 version. If I were on OS X 10.4, I would run the X11 version because it’s very reliable and it’s pretty easy to install. The only drawback is that you have to first install X11, but that’s worth doing anyway.
On Intel 10.5, I’m going to run the native version. While using it, I encountered a crash bug, (which I reported). It crashed very reliably, but, unlike Audacity, crashes do not result in the loss of saved data. The way I work with audio software is that whenever I make a change to a project, I save. Record audio. Save. Adjust panning. Save. To use the native version of Ardour, you must work this way, but you should be working this way anyway. Save early and often!
(I’ve worked in higher education as a lab assistant and I can’t tell you how many times I’ve comforted weeping students who’ve just lost hours of work. Every program crashes occasionally. My sad students were all using commercial software and lost their data. Save. And backup!)

Getting Started

First do all the configuration and whatnot in my previous post. Then

  1. Start Jack Pilot
  2. Click it’s start button
  3. Start Ardour

That’s either version, native or X11. (The other issue I encountered with Ardour is that I keep forgetting to turn on Jack. This is not a big deal, as the friendly GUI will altert you and you can go do it. I’m forgetful enough that I created an Automator script to do it for me. If there is demand, I will distribute some version of the script.) After you start it, Ardour will open a dialog box in which it asks you to eiahter make a new session or open a previous one. Then, a large window opens which should look familiar to you if you’ve used other audio software before.

A Wee Bit More Configuration

Go to the Options menu, then go to Autoconnect. Put a checkmark next to “Auto-connect inputs to physical inputs”. Then, again in Autoconnect, put a checkmark next to “Auto-connect outputs to physical outputs”. Finally, still in the Options menu, go to Monitoring and select “Software Monitoring”.
These options are what I think most users will need. If you have fancy hardware or whatever, you may need to do something different.

Why I Recommend Ardour

  • Quality of product – Ok, the version I’m using has a crash bug, which sucks, but it’s beta. However, this is software does everything I need it to do and does so well. It might crash occasionally, but it doesn’t glitch. And let’s face it, protools has bugs too (what version is it where sometimes, inexplicably, it wouldn’t bounce to disk?). Ardour’s bugs are less annoying than the bugs I’ve faced with protools. And the developers tend to respond to bug reports.
  • Economic – This is a fully-featured audio workstation and it’s free. The developers would like it if you donate, but if you’re an impoverished student and you can’t, that’s ok. And if you’re an impoverished non-profit/NGO and you can’t, that’s ok. Or if you’re just impovershed and you can’t, that’s ok. Sliding-scale software means access for everybody. (The corollary is that if you’re not impoverished, you should make a donation.)
  • Support – Help is always available via IRC or the forums on the Ardour website. Also, unlike certain other software companies (grr), the developers of Ardour aren’t going to suddenly drop support for you to force you to purchase an upgrade.

Blogged with Flock

Audio software on 10.5 / Intel

Audacity

I’ve been starting to try to record things on my new mac, despite feeling cruddy with a bad cold. I first started out with trying to use the beta version of Audacity. It acted much more like an alpha version. After the 4th crash in which all my data was lost, I took a look back at the non-beta version of Audacity. This seems to be stable and work well. However, it just doesn’t have enough features to use it for composing. It’s great for recording a vocal-only podcast or running FX on pre-existing audio, but it’s not going to cut it for my needs now. So I turned to Ardour.

Ardour

Ardour does just about everything I need. It’s a competitor to Protools and Digital Performer. And it’s free!! W00t. In the past, I only ever used this on my macmini because I had a disk space shortage on my old laptop. I was less worried about the program itself and more concerned about having space for y projects. Audio files can take up a lot of space.
It has some system requirements. If you’re on 10.4, you will need to install x-windows, if you don’t already have it, which means you need to go dig out your system disk. If you’re on 10.5, you will have other issues. It requires a helper application called Jack.

Jack

Jack is awesome. If you’re on intel, once you install it, you will need to open /Applications/Utilities/Audio MIDI Setup. Under the Audio menu, open the Aggregate Device Editor.
Aggregate Device Editor

At the top part, you can create aggregate devices and give them names. In the bottom part, you can see the actual audio devices on your computer, with check boxes next to them. Check the ones that you want to use.
Then, you need to configure jack. Fire up JackPilot. You need to tell the preferences to use your aggregate device.

JackPilot Preferences

Patching the X version

10.4 is now ready to go, but 10.5 has some changes in how X windows is handled. You have two options on running Ardour. One is to run a patch. The development team has already figured out how to solve this problem, but they’re short staffed or something and haven’t updated the version or download. Ergo, you need to apply some small changes to the program by typing a few things at the prompt. This is easy enough, but if you don’t like prompts, skip to the alternate solution.
The terminal application is located at /Applications/Utilities/Terminal. Open it up. Between you and me, the terminal is awesome. It gives you all kinds of power over your computer. In a future post, I’ll link to a cool manual, but I can’t find it right now, alas. Anyway. Here’s what you do:

  1. Select the following text and copy it (by going to Copy under the Edit Menu or typing apple-C)
    Index: script
    ===================================================================
    --- script      (revision 2354)
    +++ script      (working copy)
    @@ -32,17 +32,22 @@
         sed 's/xterm/# xterm/' /usr/X11R6/lib/X11/xinit/xinitrc >> ~/.xinitrc
     fi
     
    -mkdir -p $TMP
    -cp -f "$CWD/bin/getdisplay.sh" $TMP
    -rm -f $TMP/display
    -open-x11 $TMP/getdisplay.sh || 
    -open -a XDarwin $TMP/getdisplay.sh || 
    -echo ":0" > $TMP/display
    +if uname -r | grep -sq '^9' ; then
    +    # leopard will auto-start X11 for us
    +    :
    +else 
    +    mkdir -p $TMP
    +    cp -f "$CWD/bin/getdisplay.sh" $TMP
    +    rm -f $TMP/display
    +    open-x11 $TMP/getdisplay.sh || 
    +       open -a XDarwin $TMP/getdisplay.sh || 
    +       echo ":0" > $TMP/display
     
    -while [ "$?" == "0" -a ! -f $TMP/display ]; do sleep 1; done
    -export "DISPLAY=`cat $TMP/display`"
    +    while [ "$?" == "0" -a ! -f $TMP/display ]; do sleep 1; done
    +    export "DISPLAY=`cat $TMP/display`"
     
    -ps -wx -ocommand | grep -e '[X]11' > /dev/null || exit 11
    +    ps -wx -ocommand | grep -e '[X]11' > /dev/null || exit 11
    +fi
     
     cd ~/
     shift
    
    
  2. Ok, now be relaxed. If you don’t want to know more about what that code is doing, you don’t have to. Go to your terminal and in the window there, type:
    cd; cat > ardpatch
  3. Now, still in your terminal window, paste in all the code from the clip board, by selecting paste in the edit menu or typing apple-v
  4. Still in the terminal window, type ctrl-d. What you did just then was change to your home directory (with “cd”) and then put the code into a file called “ardpatch” (with the cat > ardpatch). And then closed that file by typing ctrl-d.
  5. Ok, now you need to know the directory where you put Ardour. If you put it in /Applications, then you’re going to type:
    cd /Applications/Ardour2.app/Contents/Resources/

    but if you put it in a folder in /Applications called Audio, then what you’ll need to type is:

    cd /Applications/Audio/Ardour2.app/Contents/Resources/

    cd is changing directory and you need it to change to a hidden directory inside Ardour, so the first part is the location where you stuck the program.

  6. Then type:
    patch -p0 < ~/ardpatch

    It will tell you strange things and possibly give you an error. Ignore all that. Instead, start jack with JackPilot and then click on the Ardour2 icon to start the program. It should start up, but for me, this took several minutes, I think just because it was the first time.

You only have to apply the patch once, so you're good to go from now on. Or you can try a riskier but easier route.

Native Version

Beta software is always fun, isn't it? You can try running the native version instead. It's beta. It could crash terribly. I haven't tested it much, so I can't recommend it or warn you away or do anythng else aside from tell you it's semi-secret location.
Well, it's more an open secret. I got it from the IRC channel on freenode. If you need help, that's a good place to go, by the way. (Is IRC undergoing a renaissance or is it just me?)
The native version is at http://ardour.org/files/releases/Ardour2.2-Intel-2920.zip
It's probably a secret for a reason. I'll give it a try this afternoon and let y'all know what I think.
The native version still requires Jack. You will still need to do all the Jack configuration listed near the top.

Conclusion

The nice thing about configurations is that you usually only need to do them once. Given the amount of awesomeness crammed into Ardour, it's totally worth the bother.

Hot Power Brick

Lately, I’ve been noticing the smell of hot plastic, whenever I’m on my laptop. Just now, I tracked it down to the power brick. It’s the Apple one that came with my laptop when I purchased it in North america. Now, I’m using it in Europe. I thought these things could deal with international electricity differences without problem? Should I get a step down converter? Could it be something about the particular power outlet that it’s been plugged in to? What in it could break to cause this change, but still allow it to deliver power? Could it just be the unusual way in which the cable was coiled around it? If I do nothing, will it catch fire, resulting in massive data loss and the death of my sousaphone? Is it possessed by demons? Can this kind of problem arise from being stuffed into a messenger bag and bouncing around on the front of a small bicycle bounding over cobblestones?

This situation is suboptimal, but at least I found it before it burned a hole in a sofa cushion.

Update

computer store dude says to keep using the adaptor until it dies a natural death. I think I’ll keep it more on the floor and less on the sofa, and not leave it plugged in when I’m not around to look at it.

Securely Using a Macmini as a remote controlled audio workstation (or media center)

Let’s say you have a mac mini and a laptop and you’re too cheap and/or lazy to buy a screen, keyboard and mouse. You don’t need to! The answer lies with your laptop. It is possible to control a macmini (or any other type of mac) with another computer of nearly any variety. I happen to use a mac, but it is also possible with windows and linux.

VNC

To start off, you will need to borrow some peripherals, so you can do the initial setup. After you register and whatnot, You will want to setup VNC. This allows you access to the minimac’s desktop from your laptop. Open the minimac’s system preferences. Open sharing. Click the “Services” tab. Click the checkbox next to Apple Remote Desktop. After that, you want to set Access Privileges. This should open automatically the first time you turn remote desktop on, but if it doesn’t, click the “Access Privileges…” button.
On the left, you will see a list of users. Select yourself. On the right, you see a list of actions. If you want to allow remote control (which you do), select all of them. Below the line, there is a checkbox which says “VNC viewers may control screen with password:” Check that box and then give it a secure password. Click “ok”
You are back on the sharing – Services window. Check the box next to “Remote Login”. Ok, now click on the firewall tab to make sure your firewall is on. While you’re there, also give your computer a name that’s different from your laptop’s name then quit the user prefs.
Ok, now go to your laptop and get a VNC client. If your laptop is a mac, Chicken of the VNC is perhaps the most popular. It’s what I use. If you’re on another kind of computer, just search the internets to find a VNC client. Download and install to your laptop.

SSH Tunnelling

Ok, now it’s time to test this out. First, open a terminal on your laptop (/Applications/Utilities/Terminal.app). Then type:

sudo ssh -X username@macmini.local -L 5900/127.0.0.1/5900

(Use your username and the mane of your macmini.) It will prompt you for a password (and may quote Spiderman at you.). Type the password for your account on your laptop. (It may ask you if you’re sure you want to connect, etc. Yes, you’re sure.) Then it will ask you for a password again. Type the password for the account on your macmini. You should see a unix-type prompt. Hooray, you are logged into your macmini.
You are logged in securely, which is even better. Don’t dispair, the graphical connection is coming next, but first an optional, brief explanation of the command you just typed: Ssh is a secure way to connect with another computer. In this case, it’s also doing something called port mapping. This makes a secure connection between a port on your computer and a post on a remote computer. If you connect to that port on your local computer, it will actually, really form a secure connection with the remote port. What this means for you is that nobody can eavesdrop over your connection (an issue if you’re wireless). The reason you type sudo is because you need root privileges to tunnel on important ports.

Back to instructions

Ok, open Chicken of the VNC on your laptop. A login window will open and there will be a list of servers, hopefully with your macmini on the list. However, you are not going to click on it. Instead, click on the + button in the lower left. A new server name will come up. Type in something like “secure minimac”. On the right hand side, type in your password. Don’t change any of the other info. You want it to connect to localhost on the default port. You can tell it to remember the password if you feel like your laptop is not going to be “borrowed” by non-trusted people. Don’t click any other checkboxes. Click connect.
A window should open with a view of the screen of your minimac. If this doesn’t happen, try the following:

  1. Do you see the name of your mac in the list of servers? If not, make sure that you’ve turned on Apple Remote desktop on your minimac.
  2. Can you connect to the remote server directly, not via the secure connection? If so, you’ve got weird problems and will need to ask for help from somebody else, like your network administrator.
  3. If you cannot connect at all, the problem may be a firewall. Make sure that the firewall on your LAN allows connections on port 5900. You may need to talk with your network administrator.

Now that you have a window open onto the remote computer, try doing something. Start itunes. Play a tune! Your minimac can be a remote controlled media center. woot.

X Windows

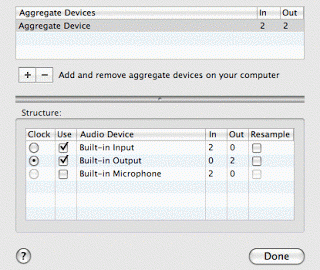
I like free software. Therefore, I want to use Ardour, which is free. My minimac has a large, external disk. Therefore, I want to run it on the mini, but control it with my wimpier laptop. First, you must install X11, which comes on the operating system CD from Apple. Install it on your laptop AND on your macmini. Also, install the developer kit on both (or at least the mini). Then, install Ardour on the macmini.
Ok,you may have noticed that sometimes VNC has a bit of lag. Because Ardour is an Xwindows application, it’s possible to reduce the lag by not using VNC. Instead, you can tell it to run on the macmini and to display on your local machine. However, this requires a smidgen of additional effort.
Apple has a bunch of information on X. It’s a good thing to read if you’re having a problem or just want to understand what’s going on.
First, you need to tell your macmini what you’re up to. Go back to the terminal ssh connection that you made from the laptop to the macmini. (If you closed the connection, reopen it). Then cut and paste the following commands to the terminal window:

sed 's/#X11Forwarding no/X11Forwarding yes/' /etc/sshd_config > /tmp/sshd_config
sudo mv /tmp/sshd_config /etc/.
sudo chown root /etc/sshd_config

You will need to type the password for your account on the macmini. These commands tell the ssh daemon to allow X forwarding. You may need to restart the sshd (or, if you don’t know how to do that, just reboot the whole computer by typing “sudo shutdown -r now” (without the quotes)). It would also probably be a good idea to repair disk permissions at this time.
Now, reconnect to your computer, using the same ssh command above. The -X flag allows X forwarding. That one typed command enables all your secure communications! Open X-windows on your laptop. Type into the terminal connection to the minimac:

/usr/X11R6/bin/xeyes

If all is working, a pair of eyeballs should open on your laptop. If all is not working, you’re going to have to look at some apple documents to figure this out.

Remote Ardour

Ardour, by default,opens windows on the machine that launched it. This means that if you launch it on your macmini, you can control if via VNC right away. But this is not efficient. It’s better to close VNC and just use X for this process. There are a few ways to make this happen. The one I’m describing is not the best, but it does work (hopefully). Note that the following assumes that you put Ardour.app in /Applications. If you put it someplace else, you will have to modify the path below
On your macmini, type:

cd
mkdir bin
cd bin
cat > ardour
#/bin/sh -l

/Applications/Ardour.app/Contents/Resources/bin/exporter

type control-D. Then type:

cd
cat >> .profile

PATH=$PATH:$HOME/bin

export PATH

Type ctrl-d again. What you’ve done is create a tiny executable file that uses the right path to open Ardour and added that path to your shell. You could also do this with an alias.
Logout. (type “exit”). Then log back in (with the long ssh command way above). Open X-windows on your laptop. Type “ardour” (without the quotes) at the terminal prompt. A window should open on your local machine.
Hopefully this all will save somebody else a lot of time.

Planned Obsolescence

Ok, Apple Computer makes great products that are plug and play. Provided that everything is all the same age. For example, if you have one of the first generation Apple-branded flat screen monitors, you cannot plug it into a Mac mini. The pin assignment and whatnot of the plug have not changed. But the size of the plug has changed. The Apple stores don’t sell adaptors.

Maybe Apple resellers sell an adaptor, but that’s hard to know since apple intentionally bankrupted most of them. It’s worth noting here, as an aside, that the VGA plug has not changed since it was introduced. While your 1999 Apple monitor is “too old,” you 1985 VGA monitor will still work fine with any VGA-equipped computer.
It’s time to stop pretending that Apple is somehow the high road. They do every Microsoft-like trick they can get away with. The only reason their products are better is because they’re trying to catch up in market share. If they achieved the position of dominance that Microsoft has, they would start selling crap products too.
For desktop computers, I’m switching to linux from now on. I have to build half the tools that I use anyway. It would only be slightly more work to build the whole system and at least then I would have the latest version of everything instead of waiting for the fink port.

Edit

Ok, the reason the plug changed is because Apple decided to switch from their own standard to an industry standard, which is an idea that I support. However, it’s still true that their own stores don’t carry the $100 adaptors and that all the best resellers are dead. And that their so-called geniuses don’t tell you jack about what’s up with changing plug sizes. Also, if you want to add RAM to a Mac mini, you’re going to be shelling out for an hour of labor. Ouch. Order it with the ram, don’t plan to upgrade.